blog for UniSA digital photography thurs am

Echo, 2011, Michael Zavros, oil on canvas

I was celebrating the finish of Digital Photography with a coffee at my favourite cafe (Mylor cafe) and started looking through an art magazine, Art and Australia, 2011. I thought it would be interesting to see how much of a contribution digital photography made. When I first saw the above image I thought it was a digital photograph. It has the epic scale and detail that we have seen so many times in class. Michael Zavros is a ‘super-real’ painter, not unlike digital photographers who often make their subjects more real than real. Zavros’s detail is down to the last hair, like Alexia Sinclair’s work.

Fur, 2010, Michael Zavros, charcoal on paper.

I guess this demonstrates that painters and photographers use the same principles to produce art (e.g. contrast, composition, colour) while using different techniques.

Also featured in  Art Australia was the Moscow based collective, AES & F. Their work recreates tableaus of stories from history and legend, not unlike old paintings of battlefields.

The Feast of Trimacchio, #2, 2010, AES & F, digital collage.

The New Zealand photographer, Richard Orjis, had his work described as ‘arresting’. He combines ‘nature and culture’ to create ‘savage beauty’ in what look to be very complicated images. However, this is balanced by other works that are very simple in concept. I liked his floral works, to me they are an example of the ‘super real’. Perfect flowers in abundance, arranged as flowers often are, but around people rather than in a vase.

Flower Idol, 2006, Richard Orjis.

Like a Flame, 2008, Richard Orjis.

There were more art paintings than art photos in Art Australia but enough photographers were represented to give a good impression of art photography.  It was certainly an enjoyable exercise: cappuccino, friand and fine art photography!

Georges Antoni Australian Fashion Photographer

Check out this website for lots of his photos!

Last week, Sarah, presented some of the work of the Australian fashion photographer, Georges Antoni. He has worked for a lot of the big fashion designers and department stores. He must have always had in interest in photography and appears to have been self taught. Just imagine being able to walk in off the street and get a job as a photographer at a modelling agency without any qualifications!

His childhood has obviously influenced his specialisation, growing up with sisters and the family run clothes shop. I’ve posted a link to his website which has a comprehensive showing of his work. He uses contrast, composition and negative space to build his photos. He says that he loves the accountability of being a photographer. A good photo means he has done  a good job. A bad photo means he has done a bad job. The evidence is there for all to see. However, we watched a fashion shoot for the store Jacqueline Eve and there were a lot of other people involved (from creating the initial concept and designing the clothes to creating the right look with makeup, hair, clothes, mood etc.). So he is not in total control but has the task of bringing it all together successfully.

The exercises in Week 11 had us using the clone stamp, healing brush and patch tool to remove blemishes from and generally improve the appearance of skin. When I got home I found a recent photo of myself and had a go!

Before

I mainly used the clone stamp to remove my lines but before this I used Surface Blur to even out the skin.

After touching up lines and marks.

Sometimes being a mature age student at Uni has its advantages, I’ve got some excellent material to work with!

Week 10 Exercises

This week we learnt how to place layers on top of a photo to change its look and feel. For example, applying an image of vintage wallpaper over a portrait gives the portrait an nostalgic look. The opacity of the overlaying layer is reduced so that the portrait can still be seen. If you want, you can erase some of the overlaying layer to highlight areas of the portrait underneath.

Portrait layered with vintage wallpaper.


We also learnt how to add noise. For example, to simulate the grain of film photography. To give the image of a little dog near and old building more character it was first converted to black and white. Then an adjustment layer to change curves was created so that the dog could be made darker. Then noise was added (21%) and the contrast was increased.

Before

After


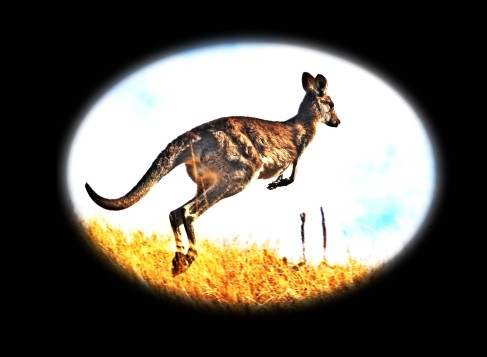
Image

After placing a vignette around the kangaroo, I adjusted the curves to increase the yellow of the grass. 

In Week 10 of Digital Photography, Matt presented some of the work of the surrealist photographer, David LaChapelle. He uses very rich colours and giant props to create some interesting situations. It was interesting seeing how much effort is involved in setting up each scene.

Elton John by David LaChapelle

The next presentation by Sheri was on the work of Jill Greenberg. The range of colours she uses is not as strong a David LaChapelle but is still very saturated. Jill Greenberg uses her style of colouring (background and subject) to convey emotion, especially in the crying children portraits for end times.

Aaron Eckhart by Jill Greenberg

There are so many different types of photography! Alicia presented rock climbing photography by Australian Simon Carter. His shots combine stunning landscapes with the action of rock climbing. He specialises in outdoor photography and has to be a very good climber himself to get into position to get a great point of view. A lot of his photos use the classic rule of thirds to generate balance and interest.

by Simon Carter

Another type of outdoor photography is street photography and Jess told us all about New York photographer Markus Hartel. He walks along city streets scanning for potential subjects. His camera stays focused for a 2m shot so the subject needs to be 2 m away. He prefers using black and white which probably helps in capturing the mood shown in his photos. The end result is real life people portrayed in an interesting way. I’d feel a bit uncomfortable taking people’s photos without their permission so I don’t know how covert he his.

Maybe she’s not so happy about having her photo taken?
…by Markus Hartel

Last week we learnt the technique of bracketing. By taking several shots of a scene or object at different exposures the best part of each shot can be combined to get the same detail over the whole image. For example, the following two photos were taken from inside but one has so much light coming  in that you can’t see outside and the other is underexposed but shows the garden beyond the windows.

Too much light coming in to get detail inside and outside at the same time

Has outside detail but interior is too dark

By copying the windows from the darker shot to the to the overexposed shot the interior looks more interesting. This technique is used where there is strong contrasts in the light.

The result of bracketing

We also learnt the technique of blurring in Photoshop (Filter…Blur..Motion Blur). By taking a still shot and dividing it into a background layer and an object layer, the object layer can be copied and blurred. Then the layers are rearranged (Background, overlaid by blurred object, then overlaid by still object) to give the impression of the object moving.

Zena Holloway


Also in week 9 we heard about the work of Zena Holloway. Fellow student, Amelia, spoke about this photographer who specialises in underwater photographer. She does both commercial and fine art, working in both open water and in a specially built tank in which she controls the lighting.

Her solo show, Swan Song, shows beautiful, ethereal figures floating in a sea of serenity. However I prefer her shots in open water, for example, looking up from underneath at a horse and dog swimming.


I presented some of the work of Cindy Sherman. I hadn’t ever heard of her before but now realise she is famous for her art and photography. She started shooting pics in the 1970s and a consistent feature of her work is that she does everything herself include being the model (ie photographer, makeup hairdresser, wardrobe manager, props procurer). She has never given titles to her work which explores identity. It is amazing how much she can change her appearance and mood. some of her earlier work looks like it has been digitally enhanced but the fact that it all happens in front of the camera makes it all the more captivating. A watched a movie from the library “Guest of Cindy Sherman” (2010) which is kind of a documentary that made me more aware of the celerity of artists, particularly in the US.


In the last 10 years she has started to use digital technology to manipulate backgrounds and facial features ( eg age herself). It is surpising to see how nice and normal she looks in real life. She continues to entertain, perplex, disgust and intrude on peoples minds with her photos.